воскресенье, 23 июля 2017 г.

Wake Up Like an Animal: Your Morning Stretching Routine


morning stretching routine for energy and strength
Editor’s note: This post was a collaboration between AoM and Mike Fitch of Animal Flow. 
When your alarm went off this morning, how did you get out of bed? Chances are you rolled out of your covers and then lumbered and shuffled over to the bathroom like a stiff-legged zombie.
Could you use a little more vim and vigor — a little more ferocity — at the start of the day? Then consider taking a cue from the morning routines of animals. Most animals don’t awaken from slumber and immediately get going, but rather stretch themselves out first.
American Indians, who lived much closer to nature than we moderns do, readily observed this fact, and adopted the practice into their own morning routines. In a couple of places in his century-old writings, Ohiyesa, a Sioux tribesman, explained why:
“In awakening his sleeping body, the Indian patterns after his animal friends. You will observe that no dog gets up and walks off without thoroughly stretching himself, from the nose to the tip of his tail. This is an excellent cure for early morning laziness.”
“The Indian must always arouse every fiber of his body before he begins the day. The first thing he does when he awakes is to stretch every limb to the utmost, and finally the entire body. He takes pleasure in the most tremendous yawns.”
If you’d like to shake off your morning laziness each day, follow in the Sioux’s footsteps, who were following in animals’ paw prints. Stretching yourself out as soon as you wake up will get your blood flowing, release any stiffness and kinks that may have developed during the night, and leave you limber and invigorated to tackle your day.
The following 8 exercises will get you nice and loose. They consist of mobility stretches (also called mobility movements or active-dynamic stretches). Instead of bringing a muscle to an end range and holding for time (like in traditional stretching), you’ll be performing controlled repetitions, holding the end for no more than a second or two. The goal is to get slightly more range out of each additional rep. Mobility stretches are great for pushing blood and oxygen to the muscles, as well as lubing up the joints.
The whole routine will take around 15 minutes. Don’t hold your breath while you’re performing the routine (as is a common tendency), but remember to breathe throughout. If you’re shorter on time, just do a few of the movements, concentrating on the parts of your body that feel the most stiff.
Stretch yourself out at least a little each morning when you rise, and you’ll face the day roaring to go!

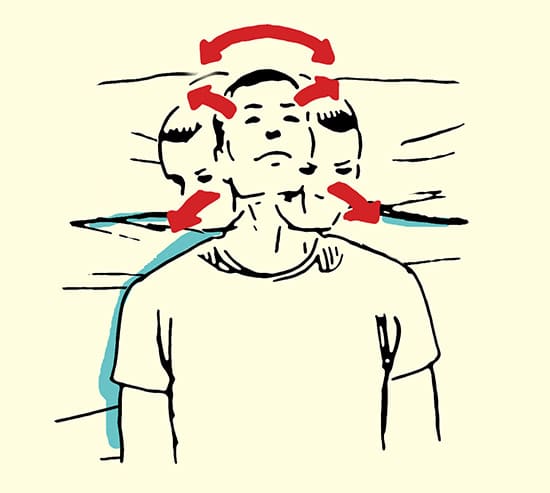
8 Corners (The Neck Mobilization)

neck mobilization stretch morning routine illustrationStart by lifting your head just slightly off of the pillow. Without moving your shoulders, allow your head to follow your eyes as you look towards each corner of your room. Begin with the corners of your ceiling first, then to the floor to complete one round. Go in a clockwise direction for 10 reps (8 corners =1 rep), then switch to counterclockwise for an additional 10 total reps. Be sure not to move your shoulders or torso.

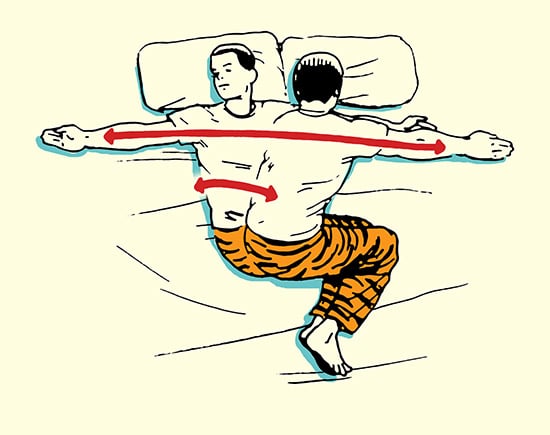
Side Lying Reach

side lying reach stretch morning routine illustration
Roll to either side, stacking your upper shoulder directly on top of the lower. Place the knees and hips at roughly a 90-degree angle. Reach forward with the upper arm, allowing it to slide past the lower hand. Reverse the movement, this time reaching in the complete opposite direction, opening up the chest. Keep your eyes on the reaching hand throughout the entire movement. This allows the head to move naturally with the shoulder. Be sure to keep the knees in contact with each other and the bed throughout. Perform 10 total reps before switching to the opposite side. 

Shoulder Clocks

shoulder clocks stretch morning stretching routine illustrationUsing the same start position as the previous movement, begin to make large circles with the upper arm in a clockwise direction. Be sure to keep the elbow completely straight and think about reaching with the arm as it travels through the circular motion. Perform 10 reps before switching to counter clockwise. Repeat on the opposite arm.

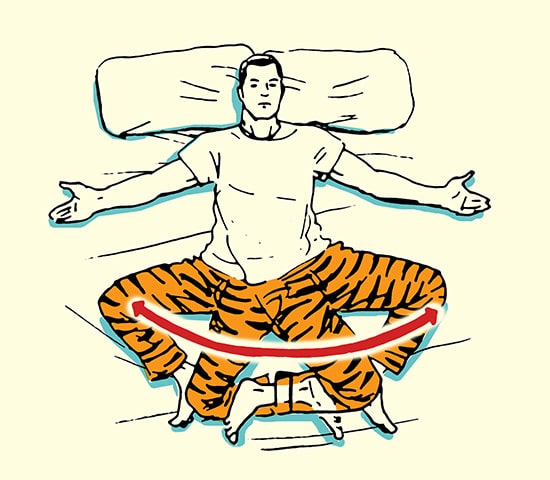
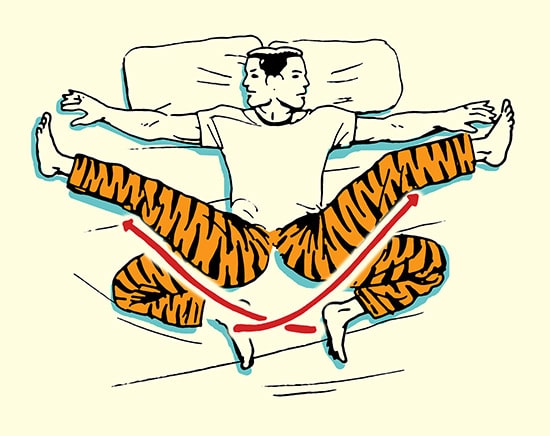
Hip Rotators (Supine 90/90)

hip rotators stretch morning stretching routine illustration
Begin on your back with the arms out to the sides, palms up. Place the feet and knees wider than hip width. The knees should be at roughly a 90-degree angle. Allow the weight of the legs to drop down towards either direction. Be sure to keep the lower back, and both shoulders in contact with the mattress. The upper knee should fall just inside the instep of the lower foot. Alternate between sides for 10-15 reps each direction.

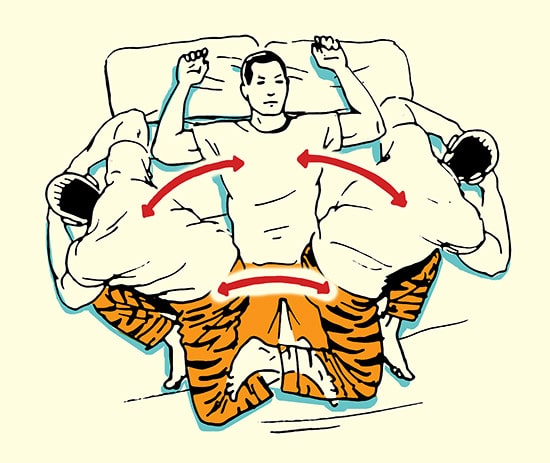
90/90 Rotational Sit-Up

rotational sit up stretch morning stretching routine illustration
Begin in the same position as the previous exercise, but this time bend the elbows and bring the arms in towards the torso. As the legs drop to one side, you’ll travel with the movement of the legs, rolling on to your side briefly before sitting up into a flexed position over the top of your legs. Reverse the movement and repeat on the opposite side. Alternate sides for 10 reps each direction.

Rotational Hamstring Kick

hamstring kick stretch morning stretching routine illustrationLay on your back with your arms out to the side and palms up. Your knees should be bent at roughly 90 degrees with the feet flat on the bed. When performing the movement, think about drawing a swoosh with the traveling foot. The foot will travel down first, then swoop up towards the opposite hand. The opposite leg will fall to the side as the hips rotate. Reverse the exact same movement to come back to start.

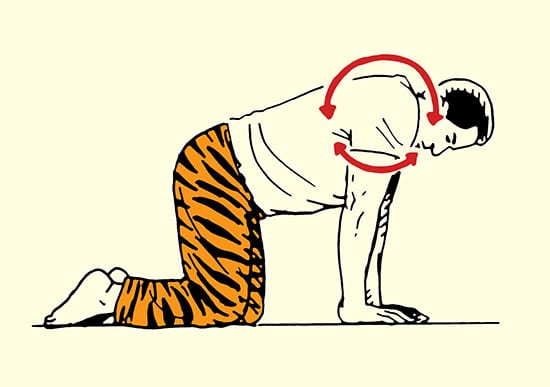
Shoulder Rolls

shoulder rolls stretch morning stretching routine illustrationCome up to a crawl position on your bed with the shoulders over the hands. Keeping the elbows straight, perform clockwise circles with the shoulder blades. Perform 10-15 circles before switching directions.

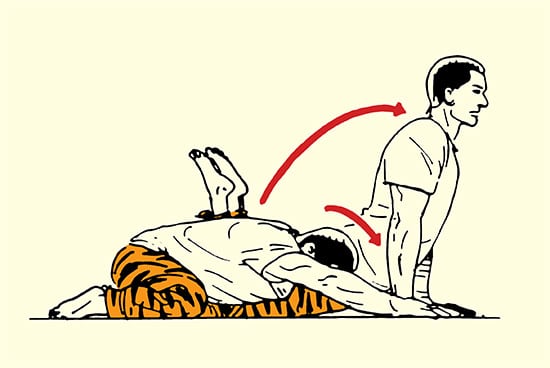
Rocking Flexion/Extension

rocking extension stretch morning stretching routine illustration
From kneeling, push your hips back towards your heels, dropping the head down between straight arms. To start the movement, lift the hips, allowing the shoulders to travel past the wrists. As the hips begin to drop down towards the bed, allow the feet to lift up towards the ceiling. Drop the hips all the way down towards the bed, squeeze the glutes, and bring the eyes to the sky. Reverse the movement by tucking the chin, then pressing back to start. Perform 10-15 reps.

Watch a Video of the Routine


_________________
Mike Fitch is the creator of the Animal Flow and Bodyweight Athlete programs as well as the president of Global Bodyweight Training.  As an international presenter, Mike’s message revolves around movement, skill acquisition, and getting to know your body better. You can follow Mike on instagram @MikeGBT.
Illustrations by Ted Slampyak

32 Strength Contests from the WWII Era


vintage soldiers wrestling basic training exercises
Editor’s note: FM 21-20 (1946) was the Army’s field manual for physical training, and consisted of exercises and fitness programs developed during World War II, which were then codified after its conclusion. The focus of the recommended exercises was getting men who had been living a fairly cushy lifestyle hardened up and ready to battle the Axis powers. We’ve highlighted many of these WWII-era workouts before, and today we’ll take a look at another aspect of GIs physical training: combative contests.
Combative contests were all-out, rough-n-tumble matches that tested a soldier’s strength, stamina, and “will to win.” They were designed to add some fun leaven to the more routine workouts the GIs did, like calisthenics and running, and to build the men’s competitive spirit. As FM 21-20 observes, “Because of this competitive factor, men will put in more effort than they ordinarily do in conditioning exercises.” Engaged in mano-a-mano or between teams, such contests develop “many valuable character qualities such as initiative, persistence, cooperation, confidence, [and] physical courage.”
The next time you and your buddies get together, try out some of these contests — go toe-to-toe with your bros, find out if you’re as tough as a WWII GI, and see who comes out the victor!

The Value of Combative Contests

This type of activity consists of individual and group contests of a rough and strenuous nature. The purpose of such contests is to develop aggressiveness, initiative, and resourcefulness in personal combat; to develop proper footwork and weight control; and to train the men to react violently with a maximum of energy for the purpose of overcoming an opponent. Regardless of previously developed habits in maneuvering in such contests, the men should be instructed to attempt to over-throw the opponent at once. Hence, in these contests, every man is trained to give his all. Defeats suffered in early practice will be compensated for by habits of aggressiveness and by the quick and adaptive thinking which grow from such practice.

Contests – Individual Competition

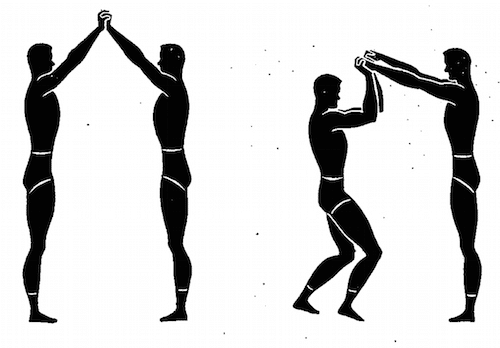
1. Pull-Hands

wwii strength and conditioning exercises pull hands illustration
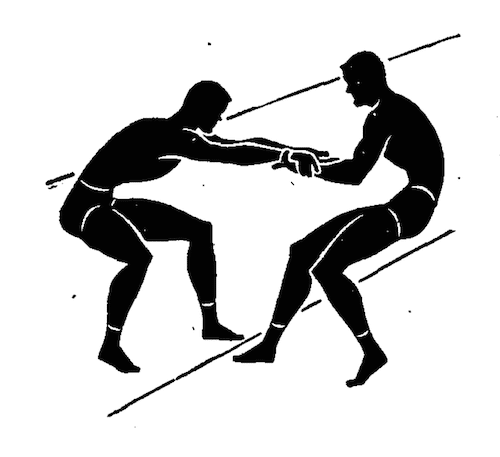
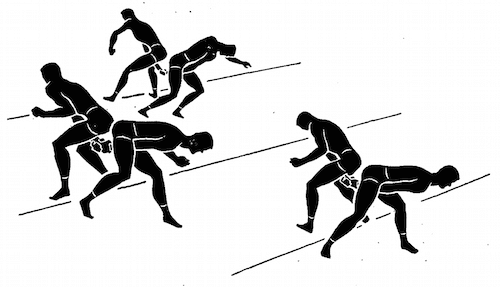
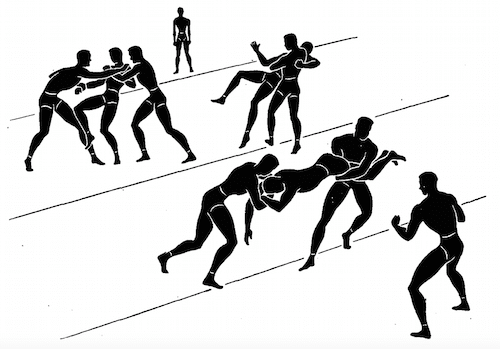
Establish three parallel lines 10 feet apart. The men are paired so they face each other about 3 feet apart, both equally distant from a middle line. They grasp each other’s wrists. At the starting signal, each man attempts to pull his opponent back across his base line. Any contestant pulled across his opponent’s base line is loser. After a predetermined time, any player pulled across the middle line is also the loser. If the hands become separated, they are rejoined at the point of separation as in the beginning. The contestant who first wins three bouts is the winner.

2. Hop and Pull-Hands

wwii strength and conditioning exercises hop and pull hands illustration
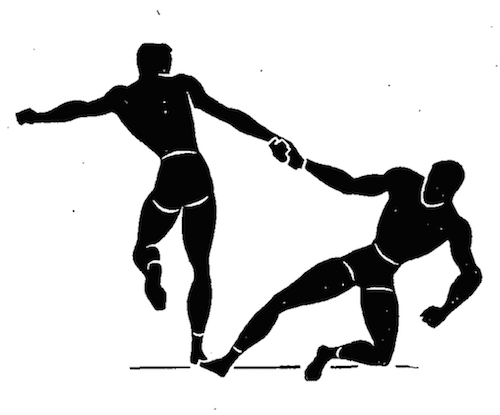
The men are matched in pairs. Each man grasps his opponent’s right hand, and hopping on his right foot, attempts to pull his opponent over the middle line. Either contestant automatically loses if he touches his rear foot to the ground. The contestant who first wins three bouts is the winner. On successive bouts, they alternate hands and feet.

3. Back-to-Back Push

wwii strength and conditioning exercises back to back push illustration
Two contestants stand back-to-back with elbows locked. Each contestant has right arm inside opponent’s left arm. A base line is established 10 feet in front of each contestant. At the starting signal, each, by pushing backward attempts to push the other over his (the opponent’s) base line. The contestants are not allowed to lift and carry their opponents. Pushing only is permitted. A contestant pushed over his own base line loses the bout. The contestant who first wins three bouts is the winner.

4. Back-to-Back Tug

wwii strength and conditioning exercises back to back tug illustration
Two contestants stand back to back with both arms linked at the elbows. Each contestant has his right arm inside opponent’s left arm. A baseline is established 10 feet in front of each contestant. At the starting signal, each attempts to drag the opponent over his baseline. Lifting and carrying are permitted. Contestants must maintain original positions with arms linked. Either contestant carried across his opponent’s baseline loses. After a predetermined time, the player carried the farthest is also the loser. The contestant who first wins three bouts is the winner.

5. Back-to-Back, Arms Between Legs

wwii strength and conditioning exercises arms between legs illustration
Contestants are paired off, back to back. A baseline is established 10 feet in front of each man. Each bends forward and, extending his right arm between his legs, grasps his opponent’s right wrist. At the starting signal, each attempts to pull his opponent across his baseline. After a predetermined time, any player who has pulled his opponent over his baseline or over to his side of middle line is the winner. Repeat with left hand and then both hands. The contestant who first wins two bouts is the winner.

6. Knock Them Down

At starting signal, each man attempts to knock opponent off his feet in any manner he chooses. He may tackle, push, pull, lift, or wrestle. First man who has any part of body except feet touching ground loses.

7. Step On Toes

wwii strength and conditioning exercises step on toes illustration
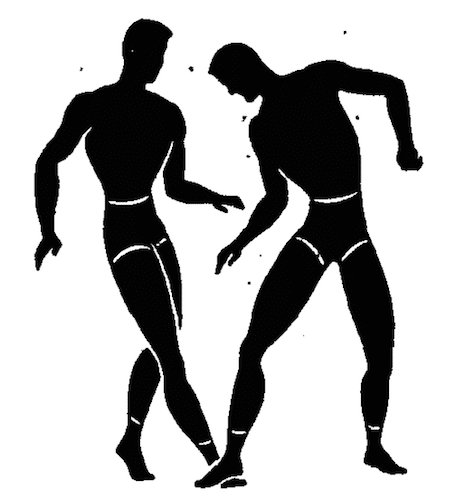
The men are paired off. At starting signal, each man attempts. to step on toes of his opponent. Activity continues until the stop signal. This is a vigorous activity if continued for about a minute.

8. Arm Lock Wrestle

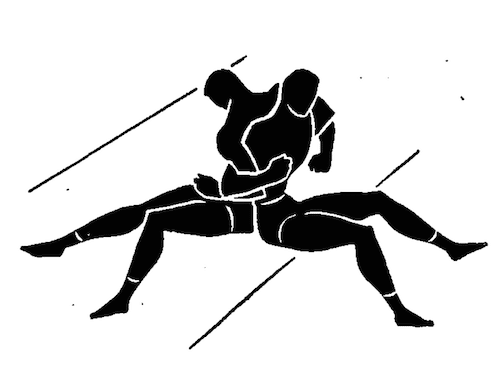
The contestants sit on the floor, back to back, with legs spread and arms locked at the elbows. Each contestant has his right arm inside his opponent’s left arm. At the starting signal, each endeavors to pull his opponent over to the side so that his left arm or shoulder touches the floor. The contestant who first wins three bouts is the winner.

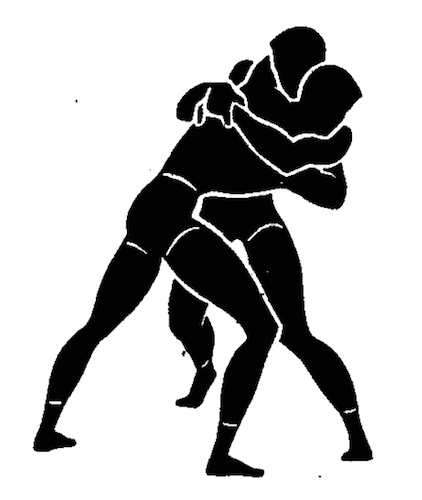
9. Wrestling from Referee’s Hold

wwii strength and conditioning exercises wrestling illustration
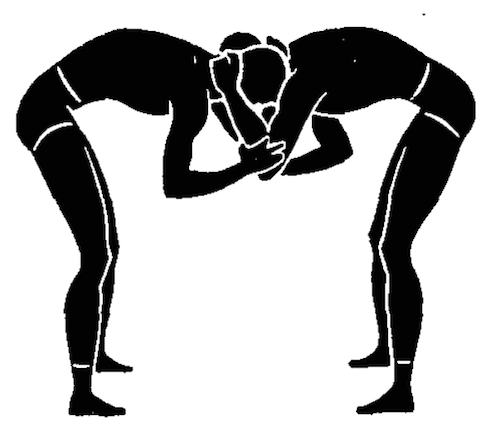
The men assume what is known in wrestling as the referee’s hold. Each contestant grasps back of opponent’s neck with left hand and opponent’s left elbow with right hand. In this position each man attempts to pull or push his opponent across a line or out of a circle.

10. Bulling

The men assume the referee’s hold, each grasping opponent’s neck with left hand and opponent’s left elbow with right hand. Each attempts to force his opponent to move one foot by pushing, pulling, or otherwise manipulating him.

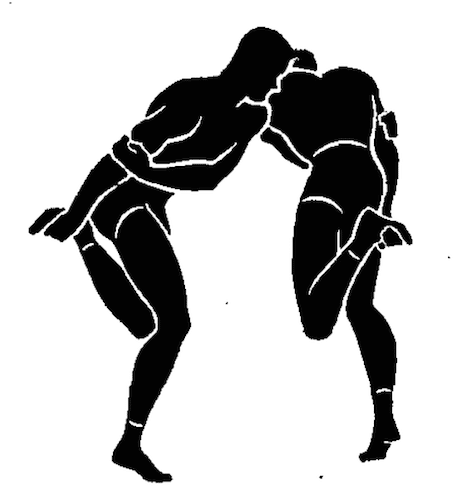
11. Rooster Fight

wwii strength and conditioning exercises rooster fight illustration
Each contestant, with arms folded across chest, hops on right foot. He uses right shoulder and right side of chest to butt his opponent. The object is to make his opponent lose his balance and fall, to unfold his arms, or to touch his free foot to the ground. The contestant who first wins three bouts is the winner.

12. Rooster Fight (Alternative)

wwii strength and conditioning exercises rooster fight illustration
Each contestant grasps his left foot with right hand from behind, and right arm with left hand. He hops on his right foot, and by butting his opponent, or by feinting and sudden evasions, forces him to let go of foot or arm. (The name is derived from the position of left leg.)

13. Stick Pull

Three parallel lines are established 10 feet apart. Two men grasp a wand, stick, or softball bat with both hands. Starting at the middle line, each man attempts to pull his opponent over his base line. The contestant who first wins three bouts is the winner.

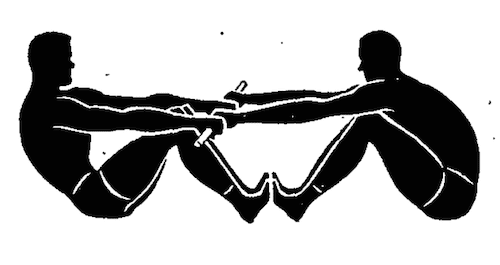
14. Pull-Stick Tug-of-War

wwii strength and conditioning exercises tug of war illustration
Two men are seated on the ground with soles of feet in contact. Each contestant grasps a stick or softball bat so that it is directly over their feet. At the starting signal, each contestant tries to pull his opponent from sitting position to feet.

15. Stick-Twist

With right palms upward and left palms downward, both contestants grasp a wand or softball bat. Upon the starting signal, the contestants try to twist the stick to the left, or counter-clockwise. After several bouts of this nature, the position of palms is changed, and the stick is twisted to the right, or clockwise. The contestant who first wins three bouts is the winner.

16. Stick-Wrestle

With right palms upward and left palms downward both contestants grasp a wand or softball bat. At starting signal both wrestle for the stick, attempting to take it away from the opponent by any means.

17. Wrist-Wrestling

Two men lie on backs, side by side, and head to feet, in such a position that the insides of right (left) elbows are side by side; fingers are interlocked; feet are spread and other arm is by side. Each man tries to press his opponents’ wrist down over against his own side. The contestant who first wins three bouts is the winner.

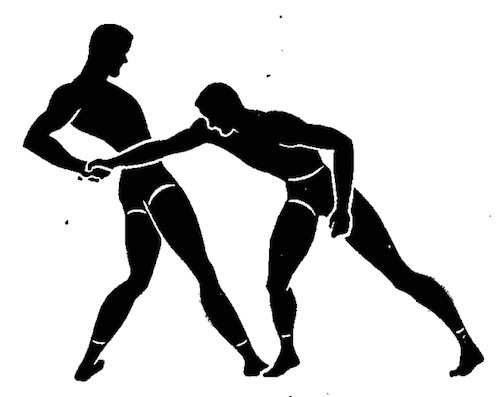
18. Hand-Wrestling

wwii strength and conditioning exercises hand wrestling illustration
The men stand facing each other. Right feet are forward and braced side by side. The men grasp right hands on the first bout (left in second bout, etc.), with little fingers interlocked. Each attempts by pulling, pushing, making a sideward movement, or otherwise maneuvering to force his opponent to move one or both feet from the original position. The contestant who first wins three bouts is the winner.

19. Harlequin Wrestling

Each man stands on his left (right) foot, holding his opponent’s right (left) hand. The object is to overbalance the opponent or to force him to put his free foot to the ground. Pushing with shoulders is not permitted. A modification of this contest is to hold free foot with free hand.

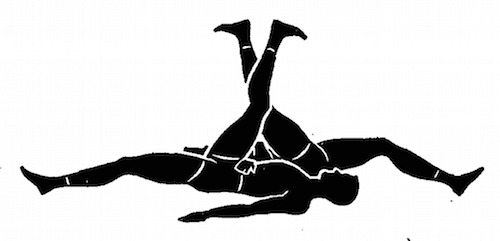
20. Indian Wrestling

wwii strength and conditioning exercises indian wrestling illustration
Two men lie on the ground, side by side, with heads in opposite directions. They link right elbows. Upon the signal of the instructor or by mutual agreement, each man raises his right leg, with knee approximately straight, far enough to engage heel of his opponent. To time the contest, each man usually raises his leg three times rhythmically, and the third time engages the opponent’s heel, attempting to roll him over backward. The right leg is used for three bouts, then the left leg for three bouts.

21. Wrist Bending

wwii strength and conditioning exercises wrist bending illustration
Opponents pair off and face each other; raise arms forward; and with palms up, lock fingers. At the starting signal, each man attempts to bend his opponent’s wrist. The hands are brought downward between contestants. The man winning three bouts first, is the winner.

22. Wrestling to Lift Off Feet

wwii strength and conditioning exercises wrestling illustration
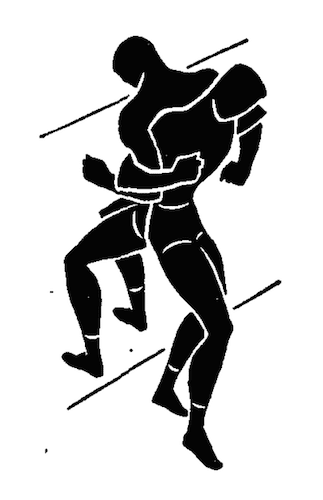
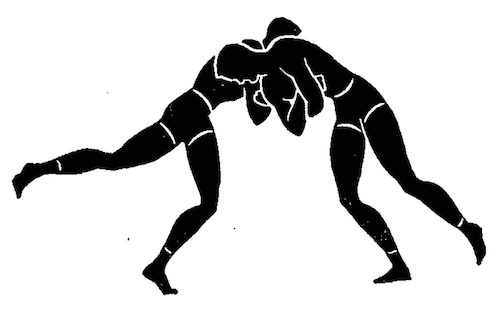
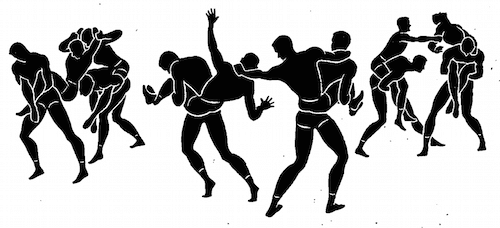
The contestant maneuvers to grasp the opponent with front or rear waist-hold, and to lift him off his feet.

23. Wrestling

Each man tries to force his opponent to touch the ground with some other part of his body than his feet.

Contests – Group or Team Competition

1. Bull in Ring

No equipment needed. Group forms in a circle holding hands. One man, termed the “Bull,” is placed in the center. If there are more than 20 men in the ring, there are two “Bulls.” The “Bull” tries to break out by charging the ring so the clasped hands are forced apart. If the “Bull” gets out, he immediately tags another player who becomes “Bull.” This game may be played by two teams, each of which forms a circle. An opposing player is the “Bull” in each circle. At the starting signal each attempts to break out by going over, under, or through. The first man to break clear wins a point for his side. The contest continues until each man has been a “Bull” in his opponents’ circle.

2. Ring Push

wwii strength and conditioning exercises ring push illustration
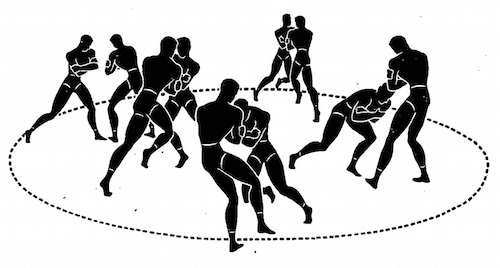
Players are divided into two clearly designated teams, both of which enter a large circle. At the starting signal, players of each team attempt to push all opponents out of circle. Players forced from the circle are eliminated. All players must keep arms folded across the chest throughout. The contest continues until all the members of one team are eliminated.

3. Ring Push (Sitting)

This activity is performed in the same manner as #2 above. However, all men are seated on the ground, back to back.

4. Line Charging

wwii strength and conditioning exercises line charging illustration
Two teams form lines facing each other about 1 foot apart. The players of each team are 1 foot apart. A line is established 10 feet behind Team “B.” At the whistle, team “A” attempts to break through the line of team “B.” Team “A” may use its hands; team “B” may not. The players of team “B” usually assume a crouched position. After 3 to 5 seconds (usually 3 at first, 5 seconds later), the referee blows his whistle and counts the number of men who have broken through the opponent’s line and reached the baseline. The team which has the greatest number of contestants reach the baseline in three attempts wins. Indoor competition may be conducted on a string of mats.

5. Island

The players are divided into two distinctively marked teams. The teams line up on opposite sides of an area approximately 10 feet square. At the starting signal, all players rush forward to the middle of the area where they attempt to remain. The players attempt to throw their opponents out of the area. If a player is forced from the island he may return if he can before the contest is terminated. The team having the greatest number of players on the island at the end of 2 minutes wins the game. Indoors a mat may be used as the island.

6. Catch and Pull Tug-of-War

wwii strength and conditioning exercises tug of war illustration
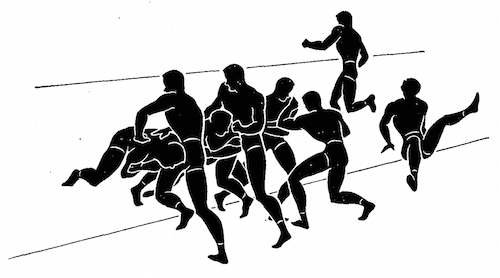
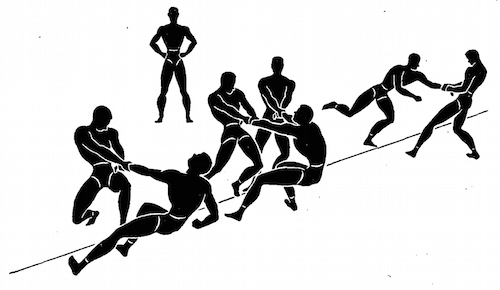
Two teams line up on either side of a line on the ground. The men attempt to grasp an opponent’s hand or wrist and pull him across the line. Two or more of one team may gang up on one opponent. When an individual touches the ground on the other side of the line, he retires to the rear of his captor’s territory as a prisoner. The contest continues until all men of one team have been pulled across the line. If any men refuse to approach closely enough to engage their opponents, the referee declares them defeated. Such practices should be discouraged, however. As a variation, those pulled across the line may join with their opponents in attacking former teammates continuing until no one is left on one side.

7. Goal Line Wrestling

wwii strength and conditioning exercises goal line wrestling illustration
This activity is performed similarly to #6 above except that a line is drawn 15 feet behind each team and when a player is carried or pulled across line behind his opponent’s side, he is declared “dead” and out of competition.

8. Horse and Rider Fights

wwii strength and conditioning exercises horse fights illustration
Players are divided into two teams and paired off. One player of each pair sits astride the hips of his partner and locks his feet in front. At the starting signal, the “horses” move forward so that the “riders” can reach each other. Each “rider” attempts to overthrow an opponent. The “horses” are not allowed to help the “riders.” The “riders” are allowed to use all fair wrestling tactics; they are not allowed to interfere with the “horses.” The “rider” who touches the floor in any way, either forced down from his “horse” or overthrown with his “horse” first loses. Last team up is the winner. This contest should only be conducted where it is not dangerous to fall.

9. Human Tug-of-War

wwii strength and conditioning exercises human tug of war illustration
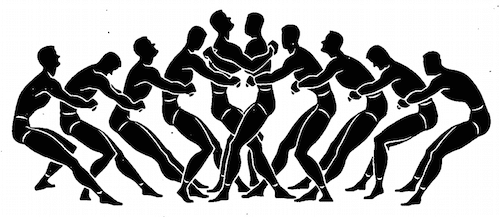
Two teams line up in two columns facing each other. Team members stand close together. Each man places his arms about the waists of the men in front of him (grasping his own left wrist with his own right hand is the strongest grip). The leading man of each team grasps his opponent about neck and shoulders. The team breaking first or having one or more men pulled over the line separating the two teams after 30 seconds is the loser.
Last updated: February 6, 2017
Are You Combat Ready?


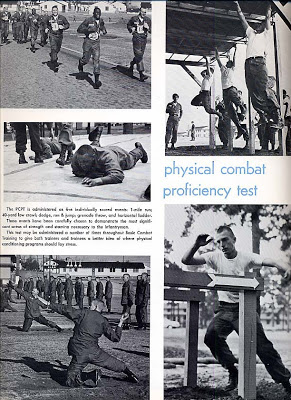
vintage military photo physical combat proficiency test

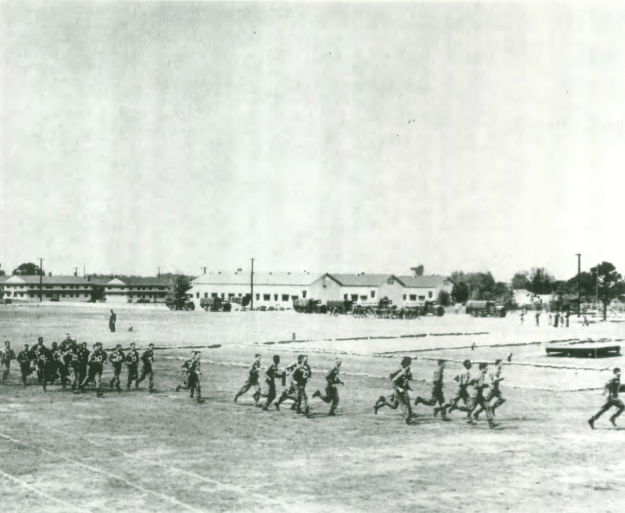
As we detailed earlier this year, the Army’s physical training test has gone through several iterations over the decades, and swung between two different areas of emphasis: combat readiness and physical fitness.
In the years during and after WWII, the Army’s robust PT test aimed to test all-around functional fitness and consisted of 5 events: pull-ups, push-ups, squat jumps, sit-ups, and a 300-yard run.
But the Korean and Vietnam wars showed the military that the test was still lacking; while it gauged physical fitness, it didn’t sufficiently correlate to the kinds of physical tasks required of soldiers in combat.
So in 1969, the Army codified a new test in FM 21-20: Physical Readiness Training. As the name of the field manual implies, the emphasis of the new test was on combat readiness; in addition to gauging soldiers’ strength, muscular endurance, and aerobic/anaerobic capacities, the Physical Combat Proficiency Test (PCPT) was also designed to assess their agility, coordination, and ability to actually perform what the Army calls “warrior tasks.” It didn’t just test physical fitness, but physical skill. The test involved 5 events: low crawl, horizontal ladder, dodge/run/jump, grenade throw (substituted with a man-carry for combat support personnel), and a 1-mile run, and participants had to complete the events in their uniform pants and boots.
In the years after the introduction of the PCPT, an emerging emphasis on aerobic fitness in the wider culture (see: jogging), a concern over rising obesity rates in new recruits, and the integration of women into the military, led the Army to create a new PT test. Introduced in 1980, the Army Physical Fitness Test required just 3 events: sit-ups, push-ups, and a 2-mile run, and could be completed in a PT uniform of shorts and sneakers. As is reflected in the name change, the APFT was designed only to assess general fitness and health, and was thought to introduce greater parity for male and female soldiers.
The APFT has come in for plenty of criticism, and the PCPT is still considered by many to be the high-water mark for the Army’s physical training tests — a true assessment of all-around functional fitness and physical skill.
If you’d like to take the Physical Combat Proficiency Test yourself (combat boots optional), below we offer a condensed version (sans the manual’s administrative details). It does require some equipment (another reason it was done away with) — 4 obstacles (simple to make, or borrow a few sawhorses) for the run, dodge, jump event and a target for the grenade throw. But it’s a fun, interesting test that will give you an idea as to whether or not you’re “combat ready.”
If you take the test, let us know how it went and how you did by sharing a photo and/or your score with @artofmanliness on Twitter or Instagram!

The Physical Combat Proficiency Test 

fm 21-20 physical readiness training manual
The Physical Combat Proficiency Test is the primary Army Physical Fitness Test and is the standard test for the measurement of physical fitness and selected physical skills. To successfully complete this test requires agility, coordination, strength, and endurance. There are two versions of the Physical Combat Proficiency Test as follows:
a. For all personnel to be tested other than those undergoing individual training the skills tested are crawling, traversing, throwing, dodging, jumping, and running. These skills are measured by five events including the 40-yard low crawl; horizontal ladder; dodge, run and jump; grenade throw; and 1-mile run.
b. For personnel undergoing BCT, AIT, and CST these same skills are measured with the exception of throwing. Weight carrying is substituted and the 150-yard man carry is used in place of the grenade throw. This version of the test is known as the Physical Combat Proficiency Test — Modified.

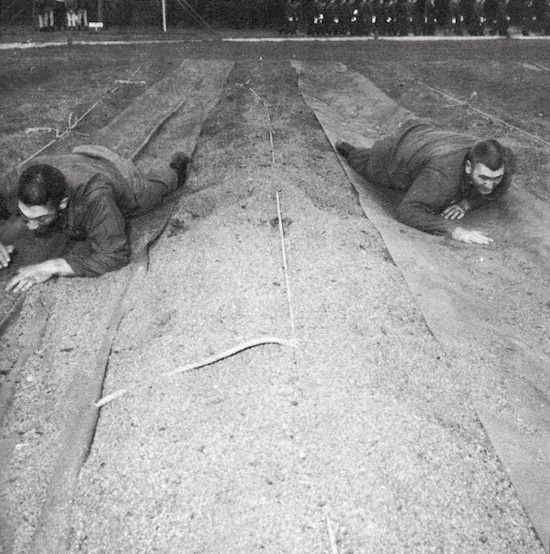
40-Yard Low Crawl – Test Event No. 1

vintage military soldiers low crawl pt training
Instructions. The 40-yard low crawl tests your ability to crawl rapidly and is a measure of your endurance.
You are to assume a prone position at the starting line with your elbows and chest resting on the line. When I give you the starting signal “GO,” you are to crawl the length of the course, and when you are near enough to the end line of your lane, reach out and touch it with your hands; and immediately turn around by spinning on your stomach and crawl back to the starting line. Time is measured from the word “GO” until your hand touches the finish line. You must crawl low, keeping some part of your trunk on the ground at all times. This means either your hips, your stomach, or your chest on the ground. You are allowed to choose your own method of crawling, as long as the form used permits ground contact with at least one part of the trunk throughout the crawl and a low silhouette is maintained.
You can be stopped for breaking ground contact, for failure to maintain a low silhouette, and for diving or lunging at the start, on the turnaround, or at the finish. You will be warned by the scorer if you commit a violation. After the third warning you will be halted and required to rerun the course. Should you again be warned three times, you will be disqualified from the event and receive no score.

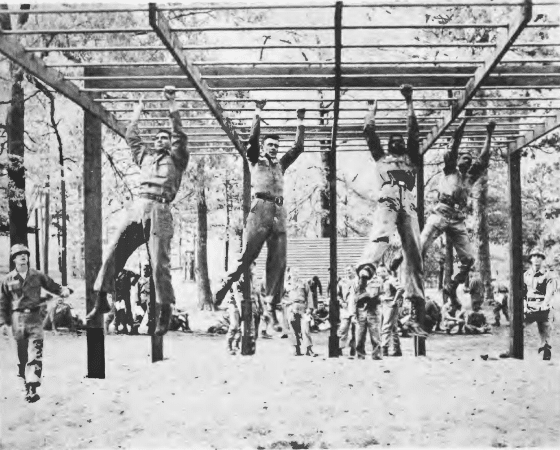
Horizontal Ladder – Test Event No. 2

vintage military boot camp pt training horizontal ladder
Ladder dimensions: height, 9 feet; length, 20 feet; width, 16 feet.
Instructions. The horizontal ladder tests the shoulder girdle area and general body coordination.
Upon my signal step up unto the supports and grasp the first rung with both hands using the forward grip. On the command “GO” swing your feet off the support and at the same time begin forward progress grasping the next rung and propelling your body forward, you must alternate your hands grasping each rung of the ladder. When you reach the end of the ladder, turn around and come back. Continue to traverse the ladder until you hear the command “STOP” at the end of a one-minute period. The lapse of time will be announced at 15-second intervals. You will be scored on the distance traversed or “walked” on the ladder during the one-minute period. If you tire and desire to stop before the expiration of the one-minute period, you may do so. In order to receive credit for the last rung, you must actually have your body weight suspended from it, rather than merely touching the rung. If you accidentally lose your grip and fall off during the first trip down the ladder, to include the act of turning around, you will be stopped and permitted to go to the end of the line to attempt the event a second time. On the second attempt the rung count starts at zero. If you fall off a second time, at any place on the ladder, no further attempts are permitted and you are scored with the number of rungs from your second attempt.
You will be stopped and required to rerun the event if you use the supports at either end of the ladder to assist you in turning around, or use the starting blocks to rest, or as a stop to secure a better grip. On the second attempt, should you again use the supports or the footrests, you will be stopped and receive the score achieved to that point.

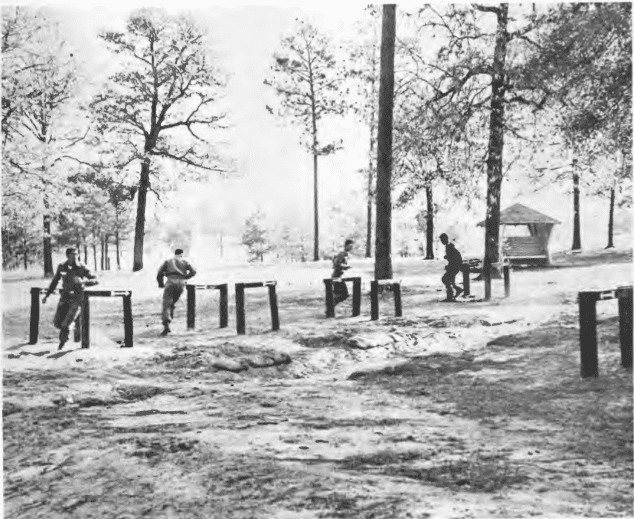
Dodge, Run, and Jump – Test Event No. 3

vintage military boot camp pt training
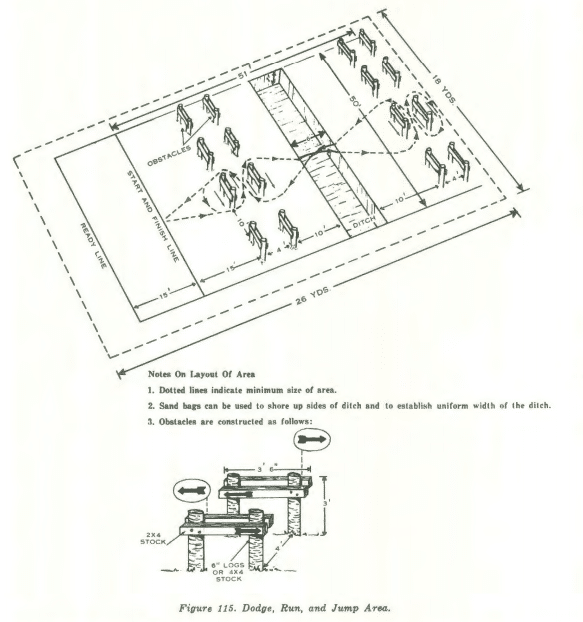
Instructions. The dodge, run, and jump tests your ability to rapidly change directions while running and to jump a six-foot-wide ditch.
On the starting command “GO” begin running from the starting line as fast as possible. Run between the first two obstacles following the directional arrows. Jump the ditch and run between the last two obstacles circling completely around the last obstacle. On the return, follow the directional arrows, continuing to weave in and out between the obstacles, jump the ditch, negotiate the last two obstacles, circle the last obstacle, and start your second trip. Follow the same route as on your first trip. At the end of your second complete round trip, you will finish at the same line from where you started. Make your run as fast as possible. You cannot use your hands to assist by grasping the obstacles and you must jump the ditch. Directional arrows appear on both sides of the obstacle. Go the way the arrows point. You will be scored on your ability to rapidly dodge and run around the obstacles and to jump the ditch.
If you intentionally touch any of the obstacles, fail to clear a ditch, or run out of the pattern, you will be stopped and required to rerun the course. Should you again commit one of these offenses you will be disqualified and receive no score. Time ends when you cross the finish line on your last trip.
vintage military boot camp pt training dodge run jump

Grenade Throw – Test Event No. 4

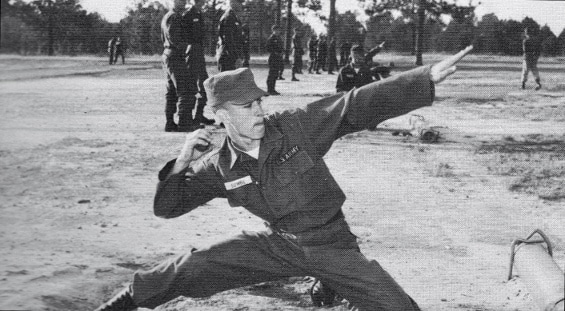
vintage military boot camp pt training grenade throw
Instructions. The grenade throw tests your ability to throw both for distance and accuracy.
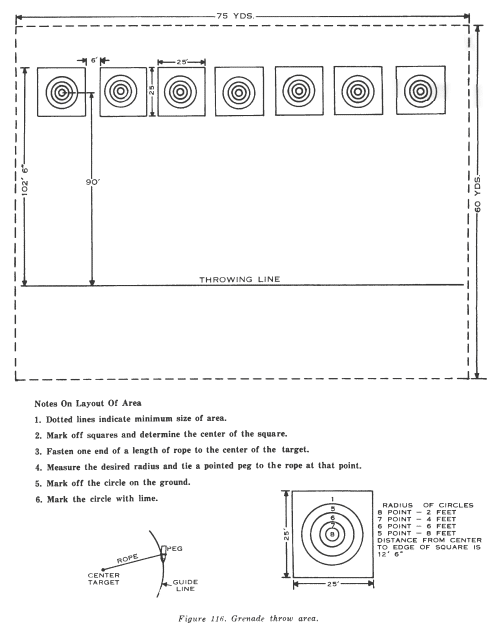
You are to throw seven grenades at the target which is 90 feet from the throwing line. The first two grenades are for practice and will not count on your score. The remaining five grenades will be scored. At my signal you are to throw one grenade at a time, attempting to have each grenade hit the center of the inner circle. You must throw from the kneeling position. In throwing, you may use any overarm motion desired. When it is your turn to throw, assume the kneeling position and watch me. I will be stationed in rear of the target area with this flag. Watch the flag signal; when the flag goes up, secure a grenade; when I drop the flag, make your throw. In throwing, take time to aim. Each of your grenades will be scored as follows:
  • 8 points for hits in the inner circle
  • 7 points for hits in the inner middle circle
  • 6 points for hits in the outer middle circle
  • 5 points for hits in the outer circle
  • 1 point if your grenade hits inside the square but fails to hit inside the circle area
A grenade hitting on any line will score the next higher value.
vintage military boot camp pt training grenade throw

The 150-Yard Man-Carry – Test Event No. 4a

vintage military boot camp pt training man carry
This event is used in place of the grenade throw for BCT, AIT, and combat support training in USATC’s.
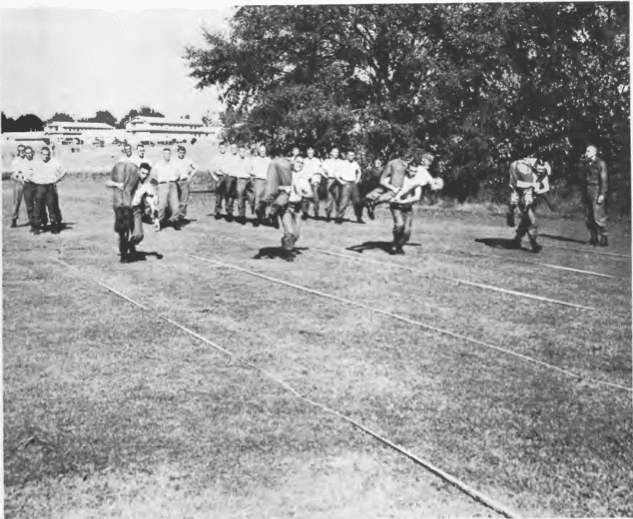
Instructions. You are now paired with a man of approximately your own weight. Do not change ranks or partners. The starting commands are: mount, get set, and go. On the command to mount, you are to lift your partner using the carry position of your choice. When ready, you may place your lead foot on the starting line. At the command “GO” move to the finish line at the far end of the course as fast as possible. If you fall, drop your partner, or he becomes unbalanced, you may pick him up or rebalance your load and continue the event. If this action is necessary, move rapidly as you are being timed. When you finish the event, lower your partner to the ground and both move behind the ready line and reassemble in rank order. The odd number ranks will carry their partners down the course, and after all the odd numbered men have completed the event, then even numbered men will carry their partners back up the course.

One-Mile Run – Test Event No. 5

vintage military boot camp pt training one mile run
Instructions. The one-mile run tests your endurance and your ability to make a prolonged run.
You will run in a group of 36 men. Another group of 36 men will start at the same time on the opposite side of the track. At the start, all runners will be to the rear of the starting line. At the command “GO” each man will start running around the one-quarter-mile track; each man setting his own pace and running to the right of the stakes marking the track. Four laps around the track equal one mile. You will start at this line, and after running four laps around the track, you will finish at this same line. As you complete each lap, an official will announce the number of laps remaining to be run. Try to pace yourself and do not run all-out on the first lap. You will be scored on your ability to run the mile in the shortest possible time.

Scoring the Test

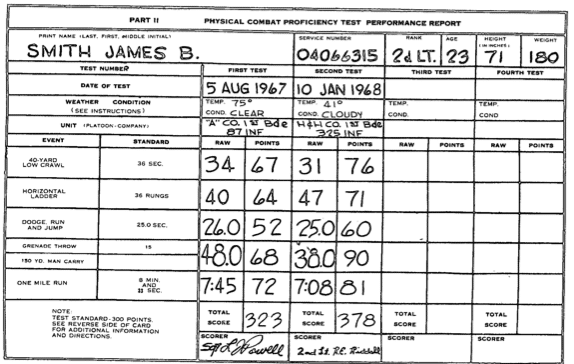
In the use of Part I of the scorecard, to convert raw scores to point scores, go down the proper event column until the actual performance in time or rungs is reached. The point value to be awarded is opposite in the first column at the extreme left of the card.
combat-test
smith3
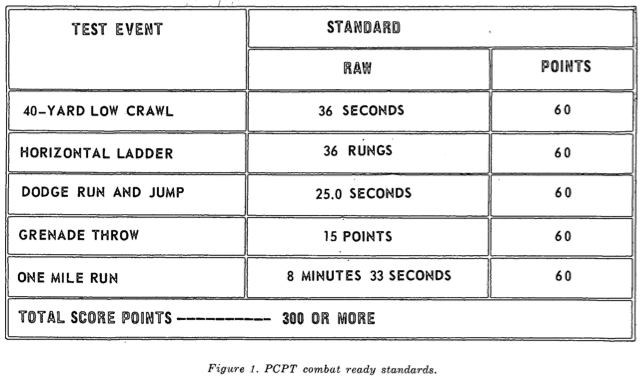
The minimum total point standard for all users of the PCPT is 300 points. Personnel in the following categories are required to attain 300 points and the additional minimum event point scores as follows:
  1. Combat and combat support. A minimum of 60 points in each of the five events (Fig. 1). Failure to attain these standards on any one event constitutes test failure regardless of total score.
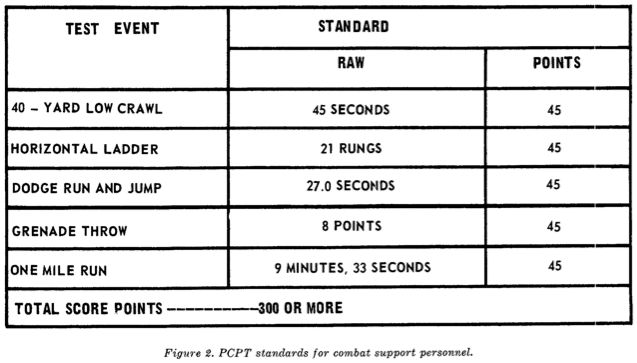
  2. Combat service support. A minimum of 45 points in each of the five events (Fig. 2). In order to score a total of 300 points it will be necessary to score more than 45 points on some or all events. Failure to attain these standards on any one event constitutes test failure regardless of total score.
score
score2