понедельник, 28 апреля 2014 г.

Squat Like a Champion


Squat Like a Champion

Here's what you need to know...

• The squat is a highly functional exercise that every athlete should be doing, or working their way up to doing.
• The biggest obstacle lifters face when squatting is their mobility. And with mobility, you either move it or lose it.
• Squatting ability should be assessed on a continuum. Find the movements that you can do well and gradually work up in difficulty as your mobility improves.
I love to squat. The unmistakable feeling of heavy weight on my back and the sound of clanging 45's always clears my mind like nothing else.
However, the barbell back squat is under fire from the same "experts" who want to abolish gym class and make overhead pressing an indictable offense.
Yes, squatting can be "dangerous" for the lower back when mobility is an issue, and certainly there are other "functional" single-leg activities you can perform in place of the squat.
But just because you might not be ready to squat today doesn't mean it'll be off the table forever. There's a way to systematically progress to performing solid squats.
That's right, like a martial artist moving from white belt to yellow and beyond, you can earn the right to squat.


But is it Functional?

title
Some experts say the squat isn't functional. Really? Well, unless you take a dump by doing a single-leg pistol squat to the bowl, or put a foot up on the tank to drop a Bulgarian-inspired deuce, a two-footed squat still takes place every day.
And why doesn't anyone call out the chin-up for functionality? It's not like people are doing that motion on a daily basis.
Anyway, here are four "functions" of the squat that make it worth keeping in your program:
  1. The squat functions to improve athleticism. In my 20 years of training and coaching, I've seen a lot fewer people get hurt squatting than those dropping weights on their toes. I have, however, seen thousands of athletes lower their 40 times and increase their vertical jumps by squatting.
  2. The squat functions to improve cardio. Most people think cardio involves elliptical machines, leotards, and aerobics class. Do some sets of 15-20 squats and see if your heart rate doesn't spike. Squats will improve your cardiac capacity and mental toughness.
  3. The squat functions to add muscle mass. The squat is the absolute best exercise for adding functional bodyweight. If your goal is to weigh more than people think, the squat will pack on muscle in places people can't even see.
  4. The squat functions to get athletes ready for future programming. If you're a trainer and you have to get athletes ready for college, squatting should be a staple. Single-leg dumbbell crossover step-ups might earn you points for creativity, but if you aren't making your athletes squat you aren't doing all you can to prep them.
What about all the single-leg exercises like step-ups and lunges? Are they useless? No way! I've successfully performed and programmed single-leg exercises with squats for years. I'm not sure where this "one or the other" attitude came from.


Mobility: The Real Problem

The big issue with the back squat isn't weakness – it's mobility.
Contrary to what you might hear, mobility isn't age dependent; it's movement dependent. Stop moving for an extended period of time and don't be surprised when the back squat folds you in half like a cheap lawn chair.
We all saw that photo of the one-year-old sitting in the hole of a perfect squat. Heck, some of you might've posted it on your Facebook page and commented on his "ass to grass" form.
Newsflash: Not many 30-60 year-olds have that level of mobility. Maybe that's what's supposed to happen with mobility. Fail to maintain it and you lose it.
If that's what happens, you turn the barbell squat into a "bad morning exercise," both during the workout and the next day when you hobble out of bed.
But if you keep moving and maintain or even enhance your mobility as you age, the squat doesn't have to go. You can greatly improve your mobility for squatting if you work at it.
Below is my mobility routine that I perform before every squat workout.


Squat Mobility Progression


1. Shoulder Wall Slides

Begin seated or standing against a wall with the arms held overhead. Slide the elbows, wrists, and hands down the wall to the "W" position shown. Hold for 5 seconds and repeat for 10 reps.
title


2. Soleus and Hip Flexor

Begin half-kneeling with the front foot a few inches from the wall. Lean forward to touch the knee to the wall while stretching the opposite hip. Hold for 5 seconds and repeat for 5 reps on each side.
title


3. Seated Glute and Ankle

Begin sitting with one leg crossed over the other and the hands supporting the body at the end of the chair. Lower yourself down to bring the forehead toward the knee. Hold for 5 seconds and repeat for 5 reps on each side.
title


Want Even More Depth? Change Your Shoes

Ankle mobility is the biggest limiter with the squat. Chuck Taylors might be the rage, but if ankle mobility is the limiting factor you'd be better off investing in a pair of Olympic lifting shoes. The higher heel reduces the demand for ankle ROM (range of motion) that you might not have.


Earn Your Squat

Here's a thought: The barbell back squat isn't an introductory exercise as it requires adequate mobility. So, if the back squat is giving you problems, it's better to work up to it.
Here's a 16-exercise continuum I use to help my athletes "earn their squat." The continuum begins with lower load and mobility requirements and gradually progresses to heavier, more challenging movements.
See where you fit and start there. Move up the continuum as your strength and mobility improves.
As you can see, apart from the overhead barbell squat, the back squat is near the top of the squat food chain. In my TFW System, you don't just do it – you have to earn it.
So work up to it just like you would with other lifts. You wouldn't do full cleans from the floor without a progression right? Why should the squat be any different?


On to the Next One

Hey, if you don't like squatting, don't do it. If you don't have the mobility, don't do it (at least not yet). But trying to remove it from everyone's training is weak and totally unnecessary, not to mention counter-productive.
And unless everyone starts doing single-leg step-ups onto the toilet, I still think the squat is very "functional" too.

What Comes After Planks?


By Jonathan Ross

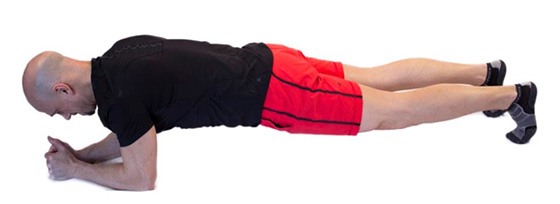
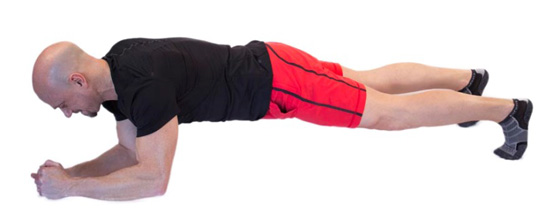
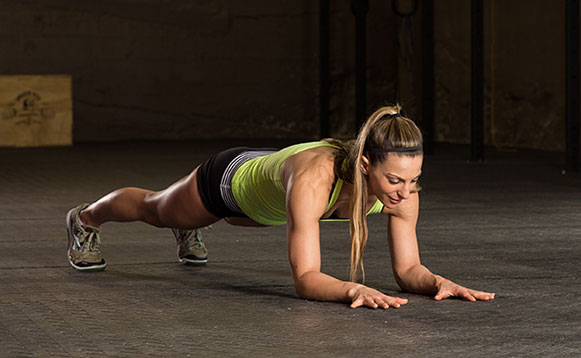
Static planks are great, but they shouldn’t be considered a goal—they are a starting point. Life is movement and our training should prepare us to do just that. The current record for the longest time in a plank position is three hours seven minutes and 15 seconds. That is beyond difficult to be sure, but it’s also kind of pointless. It’s like a long cardiovascular training session in the form of a plank. If you can hold a plank for three hours, you aren’t necessarily getting any stronger—you can simply hold a plank for a really long time.

Here’s What You Need to Know
  • Done properly, planks are a wonderful exercise for teaching trunk, hip and shoulder stability by integrating a full-body contraction. This is an ideal starting point for activity.
  • Once you’ve mastered good plank technique, stop holding it for longer amounts of time and start moving it. Despite the intense muscle burning, long isometrics actually burn the lowest number of calories. Life is movement, not the absence of it.
  • Follow a system for developing moving plank options so you know why you are adding any movement to planks.
Whenever I am speaking on the topic of ab training, I always ask the audience, “What’s the purpose of planks?” I am usually met with silence, so I’ll ask the question again, this time letting them know that they are unlikely to offer an incorrect answer. Now, I start to get some responses, most of which are abstract and generic, even if they are correct, such as: “They teach full-body stability.” “They develop good core strength.” “They help prevent back pain.” O.K., but why do I want any of that?

What’s the purpose of having good core strength and full body stability? To do stuff! It’s not a complicated answer. We tend to overcomplicate and sometimes overthink things in fitness. Whatever you (or your clients) want to do—play a sport, play tag with your kids, compete in obstacle races or catch butterflies—you want to feel good when you do it and not have to worry about your body. The same is true for the stuff we all have to do, but may not really love to do (things like doing laundry and yard work or putting away groceries).

Thus, the ultimate purpose of planks is to get better at moving. It makes little sense then to have a core-strengthening program that focuses strictly on the absence of movement. This idea has gotten out of hand to the point where some people erroneously recommend doing only anti-rotation exercises to train rotation. Think about it this way: Sitting behind the wheel of a car that is motionless is not how you learn to drive.

This idea has become popular because some have ascribed to the idea that rotation is “dangerous.” In other news, life is dangerous, so you’d better train for it. Life will ask you to move quickly, randomly and correctly at some point to avoid injury. Proximal strength equals distal power. In other words, strength in the center gives you more powerful, controlled movements.

Keeping still forever in exercise is like staying in first grade forever. You learn planks to be able to do harder things. Planks are very effective for preparing you to do something harder than a plank.

A recent ACE ProSource article examined some of the reasons why planks are, in fact, a great core exercise. The purpose of this article is to take this concept a step further and give you a framework for thoughtfully (not randomly) adding movement into planks. You and your clients can use the following system for introducing movement into your plank training:

1.    Partner reactivity 
2.    Move the torso (center of mass)
3.    Move an extremity 
4.    Translate the body through space/ambulate
5.    Combinations (combine elements of steps 1 through 4 to make new variations)

One important concept that flows through all of these examples is that you can vary the speed of movement to manipulate the intensity of any moving plank. Also, just about any plank variation will work with your choice of upper-body support position (i.e., elbow or hand).

Partner Reactivity

Sample Exercise: Side Plank in Suspension Trainer with Impulse Taps


This plank variation adds a stability challenge by having the feet in a suspension trainer, which is then further progressed by having a partner provide reactive taps to the straps.
HOW TO DO IT: Get into a side plank position in a suspension trainer with the top leg in front. With a lot of the weight on the feet (where there is the most instability), this variation can be a terrific indicator of the ability of the core muscles to absorb and control rapid and unpredictable forces while maintaining balance. (A real-world correlate would be when riding public transportation and there is a change in speed or when another passenger accidently bumps into you.) While holding the plank, the partner provides reactive taps to the straps or perhaps even to the body of the exerciser.

TIPS:
  • Having the top leg in front helps keep the hips stacked—putting the bottom leg in front makes it harder to hold stability.
  • The tapping partner has a great vantage point to enable coaching of full-body alignment during the plank. In general, looking straight ahead promotes proper alignment as the body will often go where the eyes tell the brain to move it.

Move the Torso (Center of Mass)

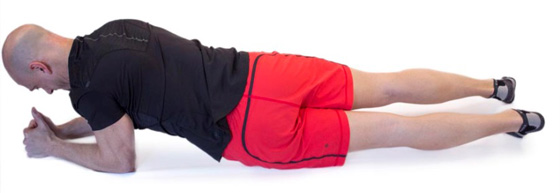
Sample Exercise: Plank With Hip Drop

This variation allows for movement of the torso, which is where the body’s center of mass is located, and trains the ability of the arms and leg to be stable with varying amounts of body weight shifting into and out of each limb.

HOW TO DO IT: Get into a plank position. From there, lower to one side as you roll through the feet to lightly touch the outer thigh to the floor. Lift up and back over, passing through the top position of a great plank, and lower down to lightly touch the other outer thigh to the floor.

TIPS:
  • Be sure to get all the way back up to the top of a plank in the center.
  • If you are unable to touch the floor without an elbow coming up, simply work within a range of motion that allows the arms to stay grounded and progress over time.


Move an Extremity

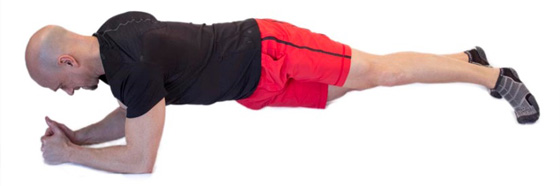
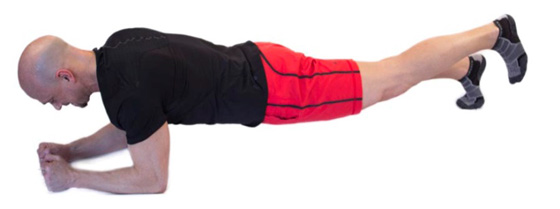
Sample Exercise: Plank With Limb Lift

This simple concept provides endless opportunities for plank variations by moving arm(s) or leg(s) in a wide variety of ways.

HOW TO DO IT: Get into a plank position. Lift a limb with control and shift the body weight over the remaining limbs that have ground contact. Lifting an arm is harder than lifting a leg; to lift a leg, keep the feet very close together to start rather than maintaining a wider base of support. The example here shows the most common variation—a leg lift—but this is really just a launching point for endless variations of arm and leg movements.

TIPS:
  • Consider moving arms and legs in the sagittal, frontal and transverse planes to aid in creating new variations of your own that provide a movement experience with maps directly to the ACE Integrated Fitness Training Model.
  • Adding speed, as in “Plank Jacks” (where your feet hop out and in, as in a jumping jack), is always a possibility once the ability to maintain stability with moving limbs is achieved.


Translate the Body Through Space
Sample Exercise: Walking Plank

Note: For a video demonstration of this exercise and others, along with details on how to form an excellent plank by using muscles of the entire body, check out Ross’s popular ACE video Plank School SaveFrom.net.

This plank variation builds on skills learned when moving both the limbs and the torso.

HOW TO DO IT: Get into a plank position at one edge of a mat. Begin to “walk” sideways on your elbows and feet until you reach the opposite edge of the mat. Return to the starting position. That’s one rep. Typically, most people’s form will begin to degrade after only three to five reps.

TIPS:
  • Watch for excessive wiggling and rotation of the hips. There will always be some, but when fatigue sets in the ability to move smoothly and with control begins to disappear rapidly.
  • For a fun variation, try this face-up (but on hands.) It’s a good idea to do some reverse or supine planking. In grade school, we’d do “crab walks” all the time. Why did we ever stop?

Bonus or alternative exercise: Suspension Trainer “Climbing” Plank


Combinations

Sample Exercise: Plank Walk-in


This plank variation combines multiple strategies discussed in this article: shifting the torso, moving the limbs and translating the body through space.

HOW TO DO IT: From a plank position, walk the feet forward in small steps. Keep the knees low but off the floor and walk them in as far as is comfortable and possible.

TIPS:
  • Take small steps and keep the knees low. As fatigue sets in, the tendency will be to take bigger steps and lift the hips higher in the air.
  • Add variations, such as walking slightly out to one side as you walk forward or even out to a side plank.
Wrap-Up
Remember, planks are great—they just shouldn’t go on forever. Once you master the skill of performing a plank, it is best to progress to a harder exercise rather than to keep performing this foundational exercise for longer amounts of time. For the majority of people, time is a precious commodity. This means that the time spent exercising must be spent performing the most valuable activities and exercises. And holding a plank for minutes at a time is ultimately a poor way to spend this valuable time when there are better options to more successfully prepare for the unpredictable nature of life’s movement demands. Life is movement, so train for it.

Power Through Control: Kettlebell Training for the Take Down


1ed5ada849921d971b8b89901e9da0cc
The ability to quickly and effectively initiate a throw or take down is a corner stone in any MMA arsenal, but to be able to do those things and throw your opponent into the ground with maximum force is a specialty of Chinese San Shou.

San Shou (literally meaning “free fighting”) is a competitive mixed martial system that grew out of traditional Chinese martial arts in Mainland China. Cung Le is the most notable San Shou fighter in recent years, having taking out veteran Frank Shamrock in 2008. Following typical Chinese Martial Arts mentality, San Shou specializes in brutal throws, however, the fight is not followed to the ground. Instead, many systems see the throw or take down as a way to injure your opponent and take them out of the game. A well-done take down is a concert of different body actions, including pushing, pulling, and rotating energies; done correctly, it can brutalize an opponent.
Power training has been used in classical martial systems for centuries. Chinese wrestlers and martial monks favor a distant cousin of the kettlebell called the Stone Lock (Shi Suo). It is used in many similar movement patterns as the kettlebell to train grip strength and explosive power. For our purposes, we will use the modern kettlebell and heavy bag.

Alternating Kettlebell Clean with Stance Shift

  1. Stand in a Horse Stance with a kettlebell racked over the lead leg and the other in a hanging position. You should be more heavily weighted on the front leg then the back leg.
  2. Quickly rotate the hips switching into a horse stance, using the momentum from the turn, alternate the kettlebells so that one is racked and one is in the hanging position. When you finish the movement, your weight should be roughly distributed equally between both legs.
Kettlebell Exercise: Alternating Clean with Stance Shift

Side-to-Side Kettlebell Rotation in Horse Stance

  1. Begin in a medium to low horse stance with the feet firmly rooted and both hands wrapped around the kettlebell handle. Your grip should be firm, yet allow for the rotation of the kettlebell handle.
  2. Quickly rotate to the opposite side, allowing the kettlebell handle to rotate in the hands.
  3. Slow the momentum and absorb the kettlebell on the opposite leg, begin rotation towards the opposite side.
Kettlebell Exercise: Side-to-Side Rotation in Horse Stance

Heavy Bag Toss

  1. Begin with a Heavy Bag standing upright on the floor.
  2. Quickly move in towards the bag so that you make contact with the bag with your torso while grabbing the bag with both arms.
  3. Explosively jump and pull the bag off of the floor.
  4. Allow the momentum to carry the bag over your shoulders.
Heavy Bag Toss Exercise

Other Useful Kettlebell Training Techniques For Takedowns

Power Clean

  1. Start with two kettlebells on the floor.
  2. Explosively extend the legs, as if you were jumping off the floor.
  3. Shrug the shoulders and pull the kettlebells in the vertical plane with the elbows up.
  4. Bring the arms under the kettlebells and catch the kettlebells in a partial squat.
  5. Stand up.

Discus Snatch

  1. Begin with the kettlebell on the floor and one leg rotated in at the hip. Keep the other leg firmly planted on the floor, the back straight, and the head forward. It is very important to fold into the rotated hip here and not to bend in the spine.
  2. Quickly push off the planted leg while rotating across the body.
  3. Use the momentum from the rotation to propel the kettlebell over head, finishing in the lockout position.
These exercises and their variations are some examples of how to use various tools to train the explosive rotational power that is needed for effective throwing and take down applications in martial arts training. The low stance used here helps to develop strong legs and the effective power generation needed for combat. They may be used together for a power oriented workout or placed individually into your other workouts. I recommend using a medium to medium/ heavy weight and performing low rep, high set workouts to get the most out of these exercises.
An example of a workout based on the power clean might look like this:
A: Kettlebell Power Clean: 10 x 3 reps (2 x 24kg)
B: Heavy Bag Toss: 5 x 3-5 reps
C: Side-to-Side Rotation: 2-4 x 30-60 sec
D: Bag and Mitt Conditioning Drills of Choice 

ABOUT AUTHOR

Brandon Cabral
Coach Brendan Cabral, founder of Thrive Athletics, has been training with the kettlebell for over 6 years and is a nationally certified coach with USA Kettlebell Lifting, a Certified Kettlebell Teacher with the International Kettlebell Fitness Federation, a Certified Kettlebell Instructor with the Association of Tactical Strength Coaches and Instructors, and a Certified Fitness Trainer with the International Sports Science Association.

Kettlebell Pistol Squat Progressions: Assisted to Explosive


c4b84d6c1fdad2a5e6b9d201aca61cc0
The Kettlebell Pistol Squat is an impressive exercise. Not only does it look good but the benefits reaped are second to none. It requires great strength, balance, coordination, symmetry, and mobility, and the movement is beneficial for everyone from professional athletes to regular Joes.
The Pistol Squat requires great balance, an often overlooked principle for many athletes and fitness enthusiasts. Improving balance can enhance your performance in many sports, allowing for increases in speed, agility, and also proprioception, decreasing the risk of injury.
The Pistol Squat also sorts out any asymmetries in glute and leg strength. We often develop asymmetries due to posture and uneven use in day to day activities. By incorporating a unilateral exercise like the pistol squat, you will eliminate that variance in time.
The Pistol Squat develops glute strength like few other exercises can. You know you have completed a session with Pistol Squats your glutes radiate with soreness for days. It uncovers movement deficiencies and dysfunction. If the knee caves in and doesn’t follow the line of the big toe, or if the hip shifts upwards and isn’t square, then you have a tell-tale sign of glute dysfunction and possible corrective exercises are necessary.
Since the Pistol Squat is a very demanding exercise, it is important to have a system of progression so you can eventually perform advanced Double Kettlebell Rack and Overhead Pistol Squats in time!
Use the following exercise progression to enhance your ability to perform Pistol Squats:

1. Bodyweight Pistol Squat to Bench with Support

Bodyweight Pistol Squat to Bench with SupportA great starting point is unweighted 1-leg squats with balance support and a reduced range of motion. You can use a suspension trainer or dowel for support and a weight bench as a platform. The key is to control the tempo in the downwards and upwards phases whilst keeping the hips square and knee tracking in the right line.

2. Bodyweight Pistol Squat with no Support and Increased Range of Motion

Bodyweight Pistol Squat with no Support and Increased Range of MotionProgress the movement by removing the support and squat to a lower level. A step or plyo box with some weight plates stacked is ideal.

3. Bodyweight Single-Leg Deck Squat or Squat to Ball

Bodyweight Single-Leg Deck Squat or Squat to BallThe next progression involves a greater range of motion and some momentum to assist in the exercise.
Firstly, you can position a basketball, med ball, or wall ball underneath your hips. This means you can squat to a greater depth and get a bit of a bounce in the most difficult portion of the movement.

Bodyweight Single-Leg Deck SquatSecondly, you can perform a Single Leg Deck Squat. The momentum of the roll in the deck squat can help propel you through the hardest part of the movement.
Once you can complete these two progressions you are ready to perform the bodyweight pistol squat to depth, unassisted. The full pistol squat is characterized by the backside making contact with the calf muscle.

4. The Kettlebell Pistol Squat

Kettlebell Pistol SquatYou now ready to perform a full Kettlebell Pistol Squat. This is not for the faint hearted! The kettlebell can be racked on the side of the lifting or non-lifting leg. It will evoke a different demand and you may have more core engagement by having it on the opposite side. You may feel more gluteal engagement when the kettlebell is racked on the same side.

Double Kettlebell Pistol SquatIf you conquer a single kettlebell then you can progress by doubling the load and adding a second kettlebell.

5. Pistol Squat with Kettlebells Overhead – 1 or 2 Kettlebells Overhead

Double Overhead Kettlebell Pistol SquatNow we are getting to a seriously difficult level of progression. The single or double Overhead Kettlebell Pistol Squat requires great mobility and stability. This will test even the greatest of athletes.

6. Plyometric Kettlebell Pistol Squats

Plyometric Kettlebell Pistol SquatPlyometric Kettlebell Pistol SquatThis is the last of our progressions and requires an explosive movement to successfully land on boxes of varying heights.

So, there you have the Kettlebell Pistol Squat with a series of regressions and progressions that are suitable for people of all levels. Incorporate them into your training and you will see great results. If you have any knee or joint issues, please consult your physician before attempting any of these movements. If you are unsure of whether or not you are performing them correctly (without a risk of injury), be sure to consult with a certified kettlebell trainer.

ABOUT AUTHOR

Dan Henderson
Dan Henderson is the owner of The Australian Institute of Kettlebells (AIK). AIK educate trainers and coaches worldwide with accredited courses in kettlebells, battling ropes, powerbags, mobility and MMA conditioning using powerbags and kettlebells. Dan has an honours degree in Human Movement and is IUKL Level 3, IKFF Level 2 and IKSFA Level 1 qualified. He has trained all over the world with many great coaches and specialises in kettlebell and battling ropes training.